Wood You Like, Natural Wooden Flooring. Everything you always wanted to know about wooden flooring, but didn't know where or whom to ask.
Wednesday, November 30, 2005
Gaps appearing in floorboards
In this period our web site is being found by a lot by people "Googling" on: floorboard gap; floorboard gap filler; gaps in floorboards, etc.
We "wood like" to explain that in this time of the year and with this weather that gaps appearing in floorboards is pretty usual. We keep track of the air humidity in our house and shop on a daily basis and during the end of autumn and winter it can drop as low as 35 - 40%
Wood works all year round and when the weather (climate) gets dryer, wood will get dryer also (as will your skin). Then it is very normal for floorboards to shrink and for gaps to appear. These gaps will disappear again when the air humidity gets higher
It's no use to fill them; it's part of the way wood works.
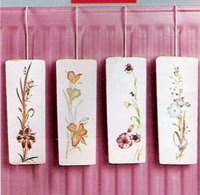
What you could do (to keep the wood and also yourself healthy): hang ceramic water containers on radiators (check regularly that they are still filled with water; you can also add a few drop of a fragrant in for a nicer or fresher smell) or hang a damp tea-towel (not dripping wet!) on radiators; that will increase the humidity slightly.
For more on wooden flooring and house-climate see here
Monday, November 28, 2005
Wooden flooring finished with lacquer or oil: differences and advantages
First of all it’s down to personal taste and secondly to what is expected of the floor, e.g. easy maintenance, shiny look or natural appearance of the wood.
Historical the wax floor is still seen as very labour intensive to maintain, who doesn’t have memories of caretakers buffing away endlessly week after week after week (be it your “Gran” or the school caretaker). Then came the ‘modern’ lacquer (and synthetic and affordable wall-to-wall carpets) and the original wax floor almost became extinct.
For many decades most of the wooden flooring in the U.K. was pre-finished lacquered or lacquered/varnished on site. Maintenance became simple, buffing a thing of the past and there is a choice between high gloss and matte appearance. The newest innovation in lacquer even has the same appearance as an oiled floor to make the wood look more ‘natural’.
The biggest disadvantage of a lacquered finish on a wooden floor is that it ‘sits’ on the floor. When damaged with a sharp object or due to the long term abrasive effect of dirt (‘dirty’ shoes ‘sanding’ away in heavy traffic areas or under chairs, tables) the lacquer doesn’t protect the wood anymore and dirt/moist will make the wooden floor look ‘grey’ regardless of maintenance efforts. In fact, cleaning damaged areas with a moist cloth will make things worse.
The only proper solution would be to sand the complete floor and to apply a new finish. Applying a proper lacquer layer is a job for the specialist, lacquer is not very forgiving to mistakes made.
The labour intensive maintenance of the old-fashioned wax-floor has now become a thing of the past: oils replaced the many layers of wax. The oil penetrates the wood deeper than lacquer and makes it moist resistance, but allowing the wood to ‘breathe’. A hardwax layer is applied afterwards to make the wear and tear layer water repellent.
Nowadays most oiled floors are pre-finished (or finished on site) with HardWaxOil, combining the natural oil (long term protection) and the carnauba or bees hardwax (wear and tear layer) in a two-in-one product. It’s very easy to apply and a very forgiving product when some mistakes are made, in fact an ideal DIY-finish (but we strongly recommend you read the instructions thoroughly and use the right equipment).
It has a great surface density and therefore very resistant to abrasive movements. Besides that, any (small) damages are very easily repaired with some wax or maintenance oil without the need to sand the whole floor.
The appearance of the finished wooden floor is matte satin with the advantage of making the floor look warmer, deeper in colour over the years.

An oiled-waxed or HardWaxOiled wooden floor requires slightly more maintenance than a lacquered floor, but not on the level of the old-fashioned knee and backbreaking wax floor, the modern maintenance products have taken care of that.
For advice on proper maintenance see our extensive tips and advice page.
Have we answered the question of what makes a better finish? No, sorry we still can’t; it’s still down to personal taste we’re afraid.
BTW, our personal taste is HardWaxOil.
Friday, November 04, 2005
What's in a name: laminated, engineered, composed etc
The most confusion is about laminated flooring, used by DIY-ers (and even some suppliers) for both Melamine Laminated Flooring (the ‘plastic’ – Melamine’ stuff with only a photo-copy of wood) and for Wood-Engineered and Wood-Veneered flooring (flooring with a solid wood top layer between 0.2mm and 6 – 8mm with a crossed-backing of pine/plywood or mdf).
In the (English) wood-flooring profession laminate is used to describe the Melamine flooring (like Pergo, Quick-step etc).
The term Wood-Veneer is officially only used when the solid wooden top layer has a thickness between 0.2 to 2.5mm but frequently searchers mean all Wood-Engineered flooring when using this term.
Wood-Engineered covers the rest of the ‘engineered’ flooring where the solid wooden top layer is more than 2.5mm thick (and can go up to even 8mm), but has a crossed-backing of a different material than the top layer.
Solid wooden flooring with cross-backing of the same wood (to make it more stable) is called ‘composed’ wooden flooring.
Real wood is sometimes used to describe Wood-Engineered and Wood-Veneer flooring as opposed to the Melamine Laminated flooring.
Another rule of thumb with Wood-Engineered is that the backing material is minimum twice the thickness of the solid top layer (i.e. 15mm total thickness of the board means that the top layer should not be thicker than 5mm). Thicker than that will cause too much tension on the board because the solid wood is much stronger than any backing. 8mm solid top layer on a 14mm plywood backing is wrong and can cause the board to buckle/cup and even split the whole board.
Miss-use of Parquet term. Where in the mainland of Europe Parquet (Parket) means wooden flooring (any wooden flooring, from solid, wood-engineered to wood block design patterns like herringbone) in the UK the term Parquet is commonly used to describe the latter: wood blocks in any design pattern.
We have noticed however that some manufacturers and retailers use the term Parquet in the UK to promote the 3-strip Wood-Engineered (or 3-strip Wood-Veneer) flooring, which does lead to disappointed customers expecting a real (solid) ‘old-fashioned’ parquet floor instead of the T&G (or click) boards they are in fact purchasing.
For more info or quotes visit our showroom in Brenchley Mews, Charing
or one of our websites:
www.woodyoulike.co.uk
www.woodyoulikediy.co.uk
Friday, September 09, 2005
Wide range of (FSC) Tropical Wooden Flooring
In our new showroom (Brenchley Mews, Charing) we now have the widest range in Tropical (FSC) Natural Wooden Flooring available.
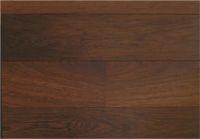
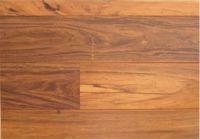
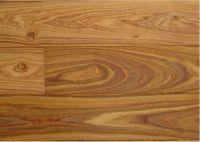
From 'standard' Merbau, Iroco to even more exotic spiecis as Wenge, Curupau Dark, Tarara Ammarillia (see pictures) for creating that extra special design in your home.
Most are availalbe in our 'Duoplank' wood-engineered range, with it's 6mm solid top layer based on 15mm water-resistant-plywood (= load-bearing) and all can be supplied pre-oiled for easy and speedy installation.
For more samples visit our online-shop.
(FSC means: The wood in this product comes from well managed forests independently certified in accordance with the rules of the Forest Stewardship Council.)
Friday, August 19, 2005
Showroom open
Opening times:
Tuesday till Saturday 9.30am till 5pm
(or give us a call on 0845-1661190 to arrange an appointment for an alternative day or time, we are more than happy to accommodate you.
7 sample floors, over 60 large sample boards: from Solid Oak, Tropical Duoplank to Wood-Engineered 3-strip Oak Rustic with Profiloc; which by the way is on offer at the moment: £ 24.95 (plus VAT) per sq m.
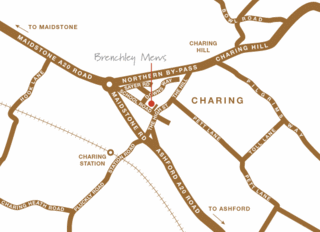
For directions to our showroom at Brenchley Mews, School Road, Charing Kent: see here
Sunday, August 07, 2005
2 down, 5 to go
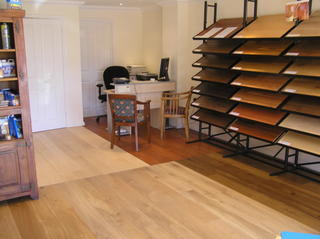
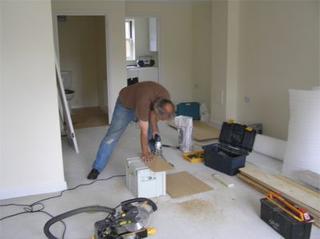
Wood You Like's new showroom in Charing Kent is definitely taken shape.
Already two of the smaller floors are in place. We used a simple, but effective Oak 3-strip Wood-Engineered for the kitchen and wc-area.
During next week the other sample floors (mainly from the Duoplank range) will arrive and be installed as will our stands for large sample boards (80) resulting in a modern, fully dedicated to Natural Wooden Flooring showroom.
Watch this space for our opening offer.
Friday, August 05, 2005
New showroom takes shape
In total we will install 5 types of our 'famous' Duoplank (load-bearing full-plank Wood-Engineered boards) in the showroom and are ready to accept more than 80 sample boards of various other Natural Wooden Flooring (from Solid, 3-strip and full-plank Wood-Engineered to Wood-Veneer and Parquet/Herringbone flooring)
Watch this space for more news and our opening offer.
Monday, July 25, 2005
Not one wall is square to another !
You have found a perfect solution for this problem!
The only things you and your husband must be aware of are:
- any 'hidden' pipes, cables underneath the existing floor
- to use proper nails. If you would hire a Portanailer the hire-people will know what kind of nails he should use.
- Installing diagonal will cause extra saw-waste.
Good luck with the job
Installing Solid Oak Panel Floor
I wish to install a solid oak panel floor. I can nail this on to an existing wooden floor, however, there is also an adjoining concrete floor that is on the same level.
Q. Is it possible to lay this timber without having to use a floating floor, otherwise there will be a 40mm step from the dining room to the kitchen?
What are my current options?
Yes it's possible to install the floor the way you described. If I understand correctly, you will not lay the floor also on the concrete part.
When installing a floor (nailing, glueing or floating) your underfloor type has to be of one sort. If you have two or more sorts (like existing floorboards and part concrete) it's best to install harboard first to create one type of underfloor to prevent difference in (moist) reactions of the floor.
For more info and advice see our DIY-site
Thursday, July 21, 2005
Installing Kempass on pine floorboards
I've been reading your posts. I'm very impressed with your generosity sharing your knowledge not by being after a sale.
I wish I had seen this forum (DIYnot) and your website before I bought the wood for a renovation I have underway.
I bought several months ago Elka/Kempass solid wood floor about 18mm thick. It has been seasoning for months in each of the rooms.
I want to use plywood over the current pine floorboards. I am thinking of using 6mm plywood and Elastilon on all the rooms of the first floor. None of the rooms are larger or wider than 3.5m but I intend to have uniform transitions between the rooms (no splitting of areas)
I've searched for plywood and have found different types. Which plywood
would you recommend. (Would you have plywood to sell for flooring purposes?)
I am planning to screw the plywood onto the current boards (don't want to use nails- far tooo permanent to my perception and too messy to remove if one happens to need to do any plumbing rework). I am wondering about gaps between the plywood sheets and overall gaps between the plywood and the walls.
By the way, would you have Elka/Kempass hardwood for sale? I will need for the ground floor. That is one I didn't buy as I am doing this project in stages.
Many thanks;
Aldo
;-) Thanks for your kind words.
To answer most of your questions:
If possible, check the moist level in the Kempas wood. Normally Oak and other wood-types must be between 8 and 12%, but experience has taught us that with Kempas it's best to be UNDER 9% (we've learned the hard-way ;-)
That's also the reason we don't do solid kempass, but if you want we can source Kempass wood-engineered full-plank for you.
Reading your question, I presume your pine floorboards are not even. If so, 6mm plywood could tackle this if it's not that bad (just slightly cupped, but we would recommend a thicker version minimum 12mm.
If the cupping is not that bad, you could also place strips of thin hardboard in the 'holes' of the floorboards, to prevent a 'bouncing-effect'. An alternative would be OSB boards.
You're right about the screws, we either use them (every 25cm, so still a lot) or staples but then you need a nail/staple gun. It's fine to leave a tiny gap between the plywood boards (wood will always work, but the cross-multi layered construction of the plywood should prevent excessive expansion) and leave a wider gap between the plywood and the walls, like you would with the wood (also handy for 'hiding' cables).
And no, we don't sell plywood, even we go to Wickes, B&Q or local timber yard for that ;-)
Elastilon is a good product, but read the instructions properly, it takes a bit of getting used to, specially the first bit.
Hope this helps, feel free to contact us with further questions, or check our DIY-site
Saturday, July 09, 2005
Our next project
The new showroom is located in the new housing estate Brenchley Mews on the School Road and will be filled with sample floors and sample boards of the most popular floor and wood types.
Plus we will stock our wide range of maintenance products, materials for DIY-ers (like parquet adhesive, HardWaxOil, thresholds, beadings etc) and floor protection items.
We will update our blog with the progress we're making, so "watch this space"
Picture shows new showroom front at Brenchley Mews, Charing (creative use of copy and paste to illustrate future sign, click on picture for better view)
Tuesday, July 05, 2005
Solid versus Wood-Engineered flooring
Since 'modern' houses have concrete floors the real need to have solid floorboards no longer exists. (Although we do sometimes hear of people insisting on installing battens on this concrete base in order to secretly nail solid floorboards. An absolute waste of materials, time and money!)
In mainland Europe more and more manufacturers make/sell more Wood-Engineered boards than Solid boards: for the reason above but also to reduce the amount of solid wood (=trees) needed; environmental friendly.
The backing (cross-layers) of Wood-Engineered boards are made of pine/plywood/mdf or chipboard, materials either recycled, rest-products or grown in controlled purpose-build forests.
(We know these boards are also sometimes known as laminated floors, but in order to prevent confusion with Melamine Laminated -'plastic'- floors Wood You Like uses the better suitable Wood-Engineered term.)
Wood-Engineered flooring is now also widely available in the full-plank version, once installed there is absolutely no difference in look with a solid floor, specially when the long sides of the boards have a (micro)bevel.
The original 3-strip Wood-Engineered flooring is very suitable in smaller rooms (bedrooms) cause they make the room look wider/bigger, plus are economical priced.
There are areas in you home we strongly recommend Wood-Engineered floors over solid floors: kitchens, bathrooms, utility rooms and conservatories. In these areas there is more moist or rapid changes in temperature where the stability of Wood-Engineered floors comes in very handy.
Also, we recommend Wood-Engineered floors with underfloor heating, again because of the stability thanks to the way these boards are build-up.
Check our on-line shop for our wide range in Wood-Engineered 3-strip, full-plank or our "Duoplank" (load-bearing Wood-Engineered board) floors we can supply (and install in the East Kent area).
Sunday, July 03, 2005
Cork strips and beading
I am fitting a parquet floor in the hallway and as instructed I have left a half inch gap for expansion. The recommendation is to fill with cork expansion strips and cover with beading. Do you have any suggestion for strips of beading that are less than 6 inches that just look out of place and also do you have tips for going around door frames?
A: Cork strips might get 'crushed' when the floor expands and will start creaking. It is not necessary to put cork strips in the expansion gap.
We sell flat beading (in any wood-type) to cover expansion gaps and once installed look like a nice 'picture-frame' We almost never use Scotia's.
Around door frames is easy or hard, depending on the amount of architrave. If almost none, try to install the beading with mitered angles. If many, the only solution is to saw underneath the architrave and door frame to create expansion gap and slide beading partly underneath.
See our on-line shop for samples:
Importance of moist measurements
Before installing a wooden floor, there are three important items you (must) check for moist:
- The underfloor, specially if concrete/screed
- The wood itself
- The air in the room(s) you're installing the wood in
Ventilate as much as possible to assist the drying process.
The moist level in concrete/screed underfloors must not exceed 2.1%.
2) Always make sure your wooden flooring comes from a reputable source. The moist content in Oak flooring (90% of all flooring in the U.K.) must be between 9 - 11 % Storing the wood in the room you intent to install it in (2 - 3 days before the works start) is good practice: it will let the wood acclimatize to the specific conditions of that room.
Beware of cheap offers telling you the wood is kilned dried: this could mean dried as normal timber to 15% Since wooden flooring is (in the U.K.) still a growth market timber yards are trying to get 'a piece of the action', but compared to traditional flooring manufacturers with 50 - 100 years of experience in drying wood for flooring, some don't really have the equipment (or knowledge! )to dry to floors correctly. So buyer beware !
3) Wood will always react to moist (or lack of) in the air. Just think of doors in Spring or Autumn jamming in the door-frame. And that's just hardly a meter wide.
Most wooden floor installation instructions speak of installing the floor by an air humidity between 50 - 65%, but does that mean you can't install your flooring when it's lower or higher?
Well, ideally 50 - 65% humidity is the best (not only for flooring, but also for your own health), but there are many days during the year that the humidity is much higher or lower (think of Winter: central heating on full, dry wind causing your skin (lips) to dry-out).
What then?
If the humidity is low, allow for a wider expansion gap between the floor and the wall (or skirtingboard). This will give the wood more space to adjust to higher humidity and to expand without getting stuck to the wall (or skirtingboard). In extreme cases the floor will still expand beyond it expansion gaps and then the only thing you can do is to ease the floor by cutting a bit of the boards hitting the wall (or skirtingboard).
If you've taken care to allow for sufficient expansion gap and your floor starts to expand in a season were it normally shrink (wood works all year round), you might have a moist problem caused by leaking pipes or rising damp.
Remember: wood likes water as long it's a tree, after that......
For more tips and advice on wooden flooring see our DIY web site
Saturday, July 02, 2005
Welcome to Wood You Like's weblog
- answer most frequently asked questions about wooden flooring
- inform you about our new projects
- inform you about new products
N.B. since we are based in the U.K. some specific question from other countries will be harder to answer for us, but we will certainly try ;-)